Email Migration
Configure UA Email on Outlook
Please visit Outlook Mobile Setup (Service Now Knowledge Base)
Sharing Calendar Access and Adding Delegates
- Open Microsoft Outlook on your computer. Outlook may be pinned to your taskbar, or you may need to input "Outlook" in the Search programs and filesfield to reveal Outlook in the list of programs installed on your computer.
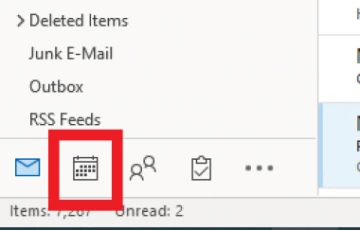
- Navigate to "Calendar" (located in the lower-left of the Outlook window) once Outlook has opened.
Image
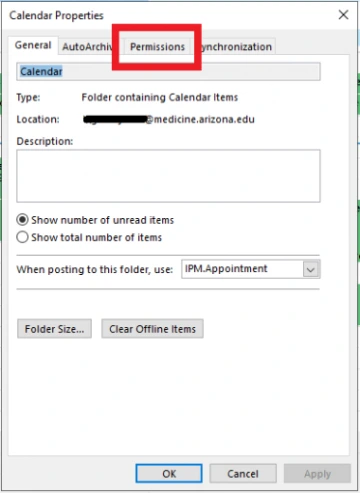
- In the sidebar of the Calendar view, find and right-click on the calendar of which you wish to edit permissions and select "Properties..." from the drop-down menu.
- Click the "Permissions" tab, and then select the "Add..." Button.
Image
Image
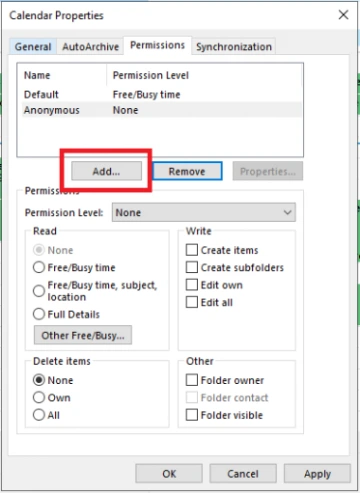
- The Add Users window will load the organizational Global Address List. Search for the person you would like to add by last name.
- Once found, double-click the name of the person to whom you wish to give access to your calendar (or highlight the person's name and click "Add ->"), then click the "OK" button.
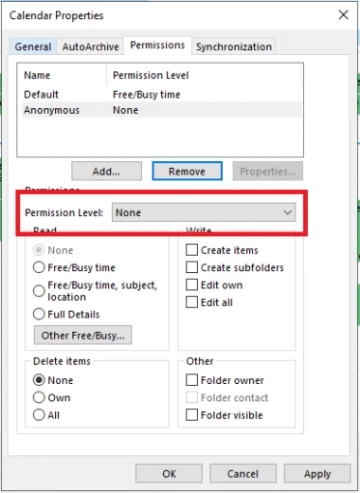
- Select the Permission Level you wish to give the user.
Image
Owner - The user will be able to see all details of events on your calendar not marked private; create, edit, and delete items not marked private; create subfolders in the calendar; as well as alter permissions on the calendar (give access to other users)
Publishing Editor - The user will be able to see all details of events on your calendar not marked private; create, edit, and delete items not marked private; as well as create subfolders in the calendar
Editor - The user will be able to see all details of events on your calendar not marked private as well as create, edit, and delete items not marked private
Publishing Author - The user will be able to see all details of events on your calendar not marked private; create items; edit and delete items that he or she has created; as well as create subfolders in the calendar
Author - The user will be able to see all details of events on your calendar not marked private, create items, as well as edit and delete items that he or she has created
Nonediting Author - The user will be able to see all details of events on your calendar not marked private, create items, as well as delete items that he or she has created
Reviewer - The user will be able to see all details of events on your calendar not marked private
Contributor - The user will only be able to see Free vs. Busy on your calendar but will have the ability to create items
Free/Busy time, subject, location - The user will be able to see Free vs. Busy on your calendar, along with the subject and location of events not marked private on your calendar
Free/Busy time - The user will be able to see only Free vs. Busy on your calendar
You can also create custom permission levels by selecting the permission attributes you wish to assign to the user. In the example below, the permission level "Publishing Editor" was edited such that the user is only able to delete the items he created.
8. Once you have selected the permission level (or attributes) you wish to assign the user, click "Apply" and repeat steps 5-9 if you wish to add or alter the calendar access permissions of other users, otherwise click "OK" to exit the Properties window.
Configure UA Email for Mobile Devices
Please visit Outlook Mobile Setup (Service Now Knowledge Base)