Outlook

Consolidating Emails into a Single Email Account

We understand that many of our faculty and staff have two separate email accounts: one linked with Banner and another provided by the University. To ensure you receive all important college-related emails in one place, we offer support to set up email forwarding between these two accounts. This ensures that no critical communication is missed, regardless of whether it's sent to your Banner or University email.

We help set up email forwarding for new faculty and staff members when they join, but we've noticed not everyone completes this process. If you haven't activated email forwarding yet, please begin with the following steps to get started. This service is all about ensuring you're always up to date with college updates and information.


Options to Consolidate Email Accounts:

Option 1: Complete this Survey and COM ITS will coordinate the forwarding of your email messages 

Option 2: Follow the steps listed below to immediately forward your @bannerhealth.com email messages to your @arizona.edu account.  If you follow these steps, you do not need to submit the survey.


To forward your bannerhealth.com email to your @arizona.edu account:

  1. Access the online version of available Microsoft applications, including the Outlook Web App (OWA). 
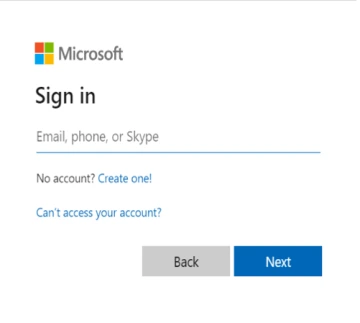
  2. Visit portal.office.com to access the online version of available Microsoft applications, including the Outlook Web App (OWA) 

    Log in with your <firstname.lastname>@bannerhealth.com address

Image
outlook1

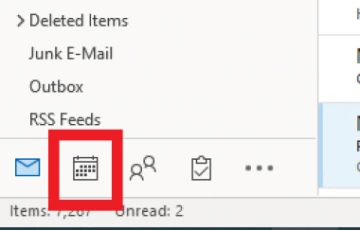
3.  Select Outlook Web App (OWA)

outlook webapp

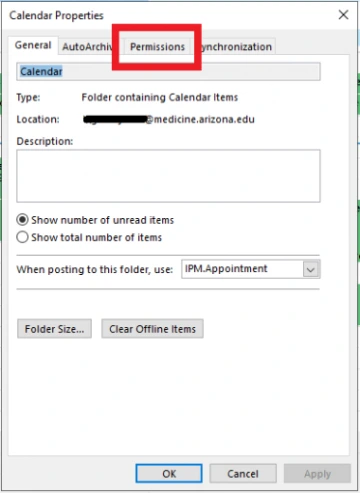
4. Look for the Settings gear icon, in the top right corner of the screen.

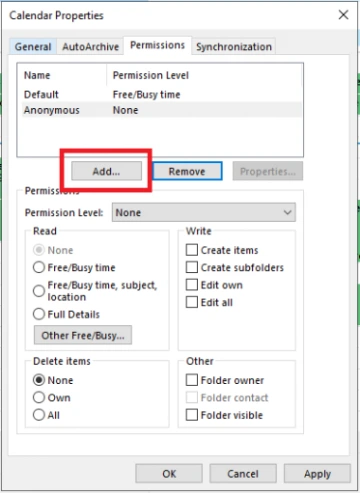
5.  Click on Forwarding in the left sidebar

outllook gear icon

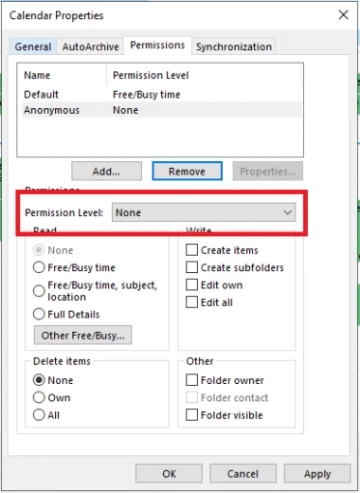
6.    Activate Enable Forwarding and enter your <net id>@arizona.edu email address

Image
Email forwarding

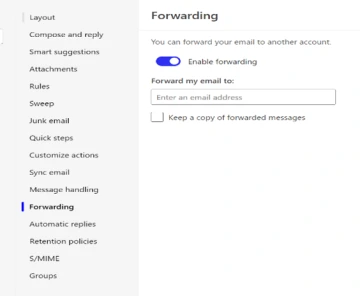
Keep a Copy of Forwarded Emails (Optional):

If you wish to keep copies of forwarded emails in your Bannerhealth.com Inbox, check the option Keep a copy of forwarded messages. If you don't check this, emails will only exist in your arizona.edu account once forwarded.

7.  Close settings

Knowledge Base Tags

Configure UAConnect365 on Outlook

Requirements: Outlook 2016 or newer.

  1. Open your Microsoft Outlook client.
  2. Click File in the upper left area of the window.
  3. Click Add Account
Image
OutLook Screenshot - Add Account

  1. When prompted for an email address, enter your NETID@email.arizona.edu
Image
OutLook Screenshot - prompted for an email address

  1. If you are prompted for the type of account, select work/school account.
  2. When prompted for a username and password, enter your netid and password.
Image
OutLook Screenshot - Enter NetID

  1. When prompted for NetID+, use your preferred method.
Image
OutLook Screenshot - Login with your preferred method

  1. A restart of Outlook will be required once the account has been added. Close and re-open Outlook.
  2. Your UAConnect365 account should now be added to Outlook.
Knowledge Base Tags

Sharing Calendar Access and Adding Delegates

  1. Open Microsoft Outlook on your computer. Outlook may be pinned to your taskbar, or you may need to input "Outlook" in the Search programs and filesfield to reveal Outlook in the list of programs installed on your computer.
  2. Navigate to "Calendar" (located in the lower-left of the Outlook window) once Outlook has opened.
Image
Screenshot - Add Calendar Delegates

  1. In the sidebar of the Calendar view, find and right-click on the calendar of which you wish to edit permissions and select "Properties..." from the drop-down menu.
  2. Click the "Permissions" tab, and then select the "Add..." Button.
Image
Screenshot - Add Calendar Delegates

Image
Screenshot - Add Calendar Delegates Step 3

  1. The Add Users window will load the organizational Global Address List. Search for the person you would like to add by last name.
  2. Once found, double-click the name of the person to whom you wish to give access to your calendar (or highlight the person's name and click "Add ->"), then click the "OK" button.
  3. Select the Permission Level you wish to give the user. 
Image
Screenshot - Add Calendar Delegates Step 4

Owner - The user will be able to see all details of events on your calendar not marked private; create, edit, and delete items not marked private; create subfolders in the calendar; as well as alter permissions on the calendar (give access to other users)

Publishing Editor - The user will be able to see all details of events on your calendar not marked private; create, edit, and delete items not marked private; as well as create subfolders in the calendar

Editor - The user will be able to see all details of events on your calendar not marked private as well as create, edit, and delete items not marked private

Publishing Author - The user will be able to see all details of events on your calendar not marked private; create items; edit and delete items that he or she has created; as well as create subfolders in the calendar

Author - The user will be able to see all details of events on your calendar not marked private, create items, as well as edit and delete items that he or she has created

Nonediting Author - The user will be able to see all details of events on your calendar not marked private, create items, as well as delete items that he or she has created

Reviewer - The user will be able to see all details of events on your calendar not marked private

Contributor - The user will only be able to see Free vs. Busy on your calendar but will have the ability to create items

Free/Busy time, subject, location - The user will be able to see Free vs. Busy on your calendar, along with the subject and location of events not marked private on your calendar

Free/Busy time - The user will be able to see only Free vs. Busy on your calendar

You can also create custom permission levels by selecting the permission attributes you wish to assign to the user. In the example below, the permission level "Publishing Editor" was edited such that the user is only able to delete the items he created.

8. Once you have selected the permission level (or attributes) you wish to assign the user, click "Apply" and repeat steps 5-9 if you wish to add or alter the calendar access permissions of other users, otherwise click "OK" to exit the Properties window.

Knowledge Base Tags